If you’ve been staring at dull, outdated cabinetry and assuming a full renovation is your only way out stop right there. Learning how to paint kitchen cabinets is one of the highest-ROI, lowest-disruption upgrades a homeowner can make. I know because I’ve stood in that exact kitchen: oak doors, brass hardware, and a look that screamed “1998 builder-grade special.”
The truth? You don’t need $30,000 to fix it. According to the Zonda Cost vs Value Report, a minor kitchen remodel the category that includes cabinet painting now returns a remarkable 113% at resale nationally, up from 96.1% just two years ago. That’s not a cosmetic update. That’s a financial win.
Understanding how to paint kitchen cabinets properly means mastering prep, materials, technique, and color. Nail all four, and the result looks like a professional installation. Rush any of them, and you’ll be repainting in 18 months. This guide gives you everything current cost data, expert-backed steps, and color guidance that actually works.
By the end, you’ll know exactly how to paint kitchen cabinets and have the confidence to execute it well. Whether you’re refreshing for yourself or prepping for a sale, this process works. Let’s get into it.
Why Painting Cabinets Is the Smartest Kitchen Move Right Now
Before getting into the how, let’s talk about the why because the financial case is stronger than most homeowners realize.
The Cost Gap Is Enormous
Based on Angi’s data from 13,847 verified projects, the national average cost to professionally paint kitchen cabinets runs $425 to $1,466, with full-service projects on larger kitchens reaching $3,200. At Homewyse’s May benchmarks, cabinet painting runs $5.40 to $10.79 per square foot.
Full cabinet replacement, by contrast, starts at $10,000 and routinely climbs past $40,000 once countertop removal, plumbing adjustments, and layout changes are folded in.
As CostToRenovate.com notes in their current analysis, fresh paint and hardware updates deliver approximately 90% ROI making it the single highest-returning cosmetic kitchen upgrade. Cabinet refacing returns around 80%; even new countertops come in at roughly 70%.
What the Numbers Actually Look Like
| Approach | Typical Cost | ROI | Approx. Value Added |
|---|---|---|---|
| Cabinet Painting (DIY) | $200–$600 | 85–90% | $170–$540 |
| Cabinet Painting (Pro) | $1,500–$6,500 | 80–90% | $1,200–$5,850 |
| Cabinet Refacing | $5,000–$12,000 | ~80% | $4,000–$9,600 |
| Full Cabinet Replacement | $10,000–$40,000+ | 50–60% | $5,000–$24,000 |
That math is hard to argue with. Painting is almost always the better financial decision especially when your cabinet boxes are still structurally sound. The process of how to paint kitchen cabinets correctly is what determines whether you land at the high or low end of that ROI range.
Color Choices That Move the Needle on Home Value
Zillow’s Paint Color Analysis found that kitchen cabinets painted in olive green boost home value by an average of $1,597, while charcoal gray can increase buyer offers by nearly $2,500. On the flip side, bright yellows can actually decrease home value by as much as $4,000. Color is not just an aesthetic decision it’s a financial one.
For broader kitchen transformation ideas, Homes Remodeler is a solid resource for pairing cabinet colors with countertop and backsplash combinations.
What You’ll Need Before You Begin
Knowing how to paint kitchen cabinets starts with gathering the right supplies. Cutting corners here is the number one reason DIY cabinet paint jobs look unprofessional and peel early.
Tools
- Screwdriver and drill (for door and hardware removal)
- Sandpaper: 120-grit and 220-grit
- Tack cloth or microfiber cloths
- Painter’s tape and plastic sheeting
- 4-inch high-density foam rollers
- 2.5-inch angled paintbrush
- Degreaser or TSP substitute
- Spray primer (optional but strongly recommended)
- Drop cloths
Paint and Primer
- Bonding primer — oil-based or shellac-based (non-negotiable)
- Cabinet-specific paint — alkyd enamel, acrylic-alkyd hybrid, or water-based enamel
- Topcoat or sealer — for high-traffic durability
“The single biggest mistake homeowners make when learning how to paint kitchen cabinets is skipping the primer. Bonding primer is what separates a finish that lasts five years from one that starts peeling in five months.” Andre Kazimierski, founder and CEO of Improovy
Step-by-Step: How to Paint Kitchen Cabinets Correctly
This is the heart of the process. Follow these steps carefully, and your cabinets will look like they came straight out of a design showroom.
Step 1 — Remove Doors, Drawers, and Hardware
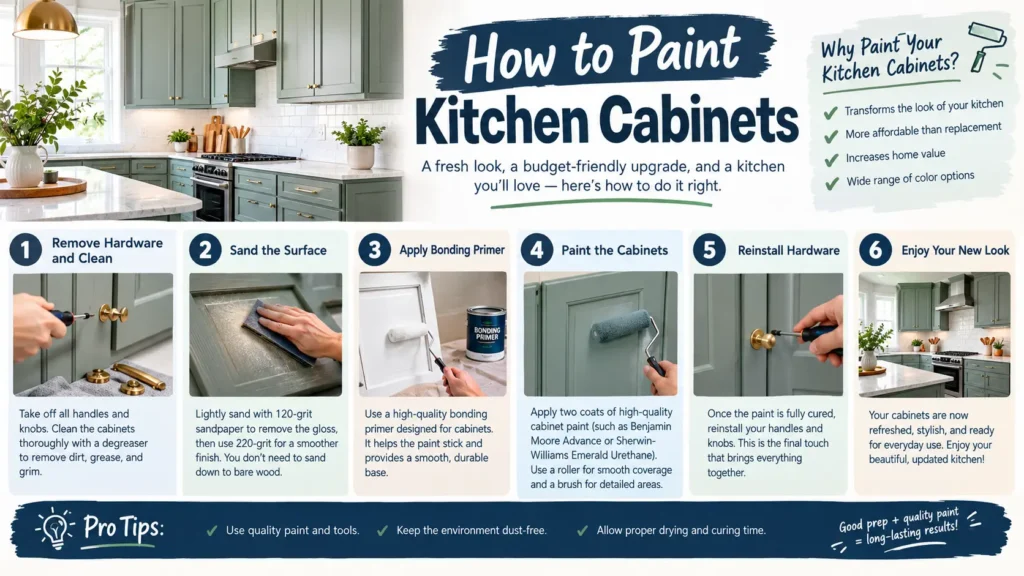
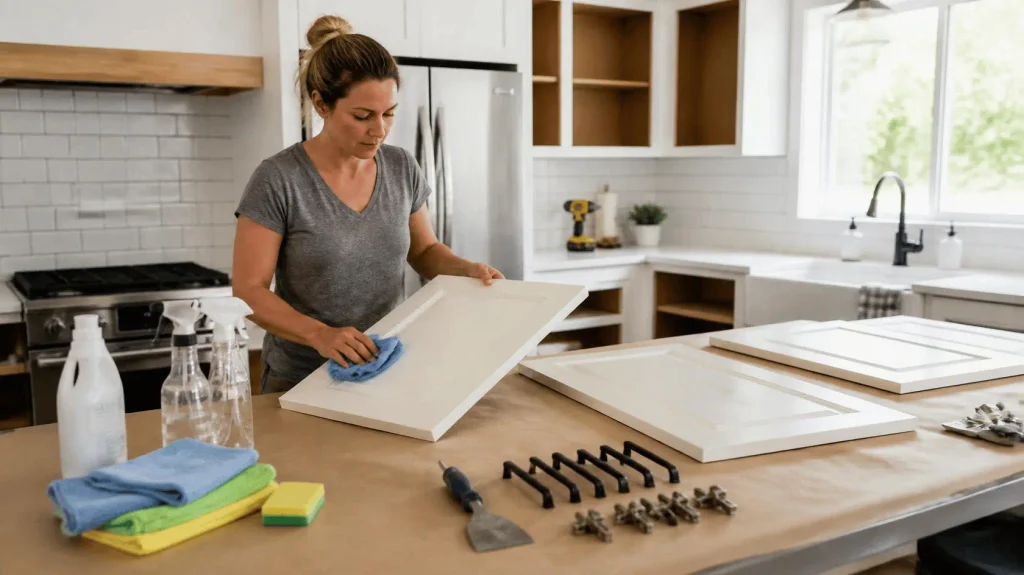
Empty your cabinets completely. Remove all doors, drawer fronts, and hardware. Label each door and its hinge location with a strip of painter’s tape this saves hours during reassembly. Store all hardware in labeled zip-lock bags.
This upfront organization is one of the most underrated parts of learning how to paint kitchen cabinets well. Rushing past it leads to mismatched hinges and doors that don’t sit flush. It’s also the step most DIY guides on how to paint kitchen cabinets cover too briefly.
Step 2 — Degrease Every Surface Thoroughly
Kitchens accumulate grease invisibly. Years of cooking leave behind a film on cabinet surfaces that will prevent paint from bonding no matter how good your primer is. Use a TSP substitute or dedicated cabinet degreaser and scrub every surface: doors, drawer fronts, and cabinet frames. Rinse with clean water and allow everything to dry completely.
Every professional guide on how to paint kitchen cabinets ranks degreasing as the most skipped and most critical step in the entire process. In fact, a thorough degreasing and proper prep separate a paint job that lasts a decade from one that peels in a year. This step is non-negotiable when mastering how to paint kitchen cabinets properly.
Step 3 — Sand for Adhesion
Use 120-grit sandpaper to lightly scuff all surfaces. You’re not stripping the finish you’re creating texture for the primer to grip. Follow with 220-grit to smooth the surface for the topcoat.
Wipe every sanded surface with a tack cloth. Any dust left behind will show through your final coat.
Step 4 — Apply Bonding Primer
This is the most important step in how to paint kitchen cabinets correctly. Apply a thin, even coat of bonding primer to all surfaces. Let it cure fully per the manufacturer’s instructions usually 2–4 hours minimum. For best results, lightly sand with 220-grit between primer coats if applying two.
Oil-based primers provide the strongest adhesion on previously finished surfaces. Shellac-based primers excel at blocking stains and tannin bleed from wood.
Step 5 — Apply Your First Coat of Paint
Use a foam roller for large flat panels and an angled brush for edges, recesses, and inset details. Work in thin, even passes heavy coats sag and drip, and fixing them means more sanding and time lost.
Paint in this sequence: back panel → sides → top and bottom edges → front face. This order is standard in every professional approach to how to paint kitchen cabinets efficiently.
Paint professionals widely recommend Benjamin Moore Advance and Sherwin-Williams Emerald Urethane as the top-performing cabinet paints available today both are low-VOC, PFAS-free, and self-leveling, producing a factory-smooth finish as they cure.
Step 6 — Sand Between Coats
Once the first coat is fully dry (minimum 4 hours, ideally overnight), lightly sand with 220-grit and wipe clean with a tack cloth. This levels minor imperfections and improves adhesion for the next coat.
This single step is what separates a good cabinet paint job from a great one and it’s the detail that distinguishes someone who truly understands how to paint kitchen cabinets from someone rushing through it.
Step 7 — Apply the Second (and Sometimes Third) Coat
Apply your second coat using identical technique. Most cabinets need two coats for full, even coverage. Significant color changes dark to light or light to dark may require a third coat.
Anyone serious about how to paint kitchen cabinets as a lasting upgrade should treat this as a multi-day project. Every professional instruction on the subject stresses that drying time is not optional. This patience is where the project is won or lost.
Step 8 — Allow Full Cure Before Reinstalling
Wait 24–48 hours minimum before rehanging doors and reinstalling hardware. Paint may feel dry to the touch in hours, but it takes longer to fully harden. Hanging doors too early leads to sticking, scratching, and damaged edges.
Completing this final step properly is the payoff for everything you’ve invested in learning how to paint kitchen cabinets correctly. Once fully cured, reinstall everything using your labeled bags. This is also the ideal moment to upgrade hardware swapping dated brass knobs for matte black or brushed nickel pulls costs under $100 and creates an immediate, dramatic improvement.
Best Cabinet Paint Colors This Season
Choosing the right color is just as important as knowing how to paint kitchen cabinets technically. The current palette has shifted away from the cool grays and stark whites that defined the past decade.
| Color | Trend Status | Best Pairing | Value Impact |
|---|---|---|---|
| Warm White / Cream | Timeless Best Seller | Marble, gold hardware | Strong resale appeal |
| Sage / Olive Green | Fastest Growing | Wood floors, stone backsplash | +$1,597 avg (Zillow) |
| Greige (Agreeable Gray) | Dominant Neutral | Natural wood accents | Broad buyer appeal |
| Navy Blue | Enduring Classic | White counters, silver fixtures | Timeless island color |
| Charcoal Gray / Soft Black | High-Value Statement | Warm lighting, quartz | +$2,500 avg (Zillow) |
| Two-Tone (Light Upper / Dark Lower) | Continuing Strong | Mixed hardware | Visual depth and dimension |
As interior designer Bobby Berk notes in his current kitchen color guide, the most popular cabinet combination right now is warm white or neutral walls paired with a committed cabinet color navy, charcoal, or deep earthy green where the cabinetry acts as the primary design statement while the walls stay quiet.
Design lead Gareth Hull at Hendel & Hendel adds that when you learn how to paint kitchen cabinets with the right color, that earthy greens like sage, moss, and olive “bring a sense of depth and calm while connecting the space to the natural world” a key priority for homeowners who want their kitchens to feel grounded and inviting.
Common Mistakes That Ruin Cabinet Paint Jobs
Even with good intentions, here’s where most people go wrong when learning how to paint kitchen cabinets:
- Using wall paint instead of cabinet enamel — Wall paint is too soft; it scuffs and scratches within weeks of daily use.
- Skipping the degreaser — Paint will not adhere over kitchen grease, no matter how good your primer is.
- Painting doors in place — Leads to drips at hinges, missed edges, and uneven finishes.
- Rushing between coats — Applying wet-on-wet causes peeling and blistering.
- Forgetting the cabinet frames — Painting only the doors while leaving the frames uncoated looks unfinished.
- Applying paint too thickly — Two thin coats always beat one heavy coat. Every time.
Avoiding these mistakes is just as important as following the right steps when mastering how to paint kitchen cabinets at a professional level.
For homes built before 1978, the EPA reports an estimated 24% chance of lead-based paint being present. Any sanding or scraping in these homes should follow certified lead-safe renovation practices.
DIY vs Professional: What Makes More Sense for You?
Here’s an honest breakdown to help you decide the best approach:
| Factor | DIY | Professional |
|---|---|---|
| Current Cost | $200–$600 materials | $1,500–$6,500 total |
| Time Investment | 3–5 days (part-time) | 2–4 days |
| Finish Quality | Good with care | Excellent with spray equipment |
| Warranty | None | Typically 1–5 years |
| Best For | Tight budgets, time flexibility | Pre-sale prep, busy homeowners |
Professional painters use HVLP spray equipment that produces a factory-smooth finish that’s nearly impossible to replicate with a brush and roller. If you’re preparing to sell and want cabinets that photograph beautifully for listings, the investment in a professional job is well justified especially given the strong ROI the upgrade returns.
How Long Does a Cabinet Paint Job Last?
Done correctly, a cabinet paint job using proper bonding primer and alkyd or hybrid enamel lasts 8–15 years with reasonable care. Longevity comes down to:
- Quality of surface degreasing and sanding prep
- Type of paint used (enamel vs standard latex wall paint)
- Application method (spray vs brush and roller)
- Cleaning habits (gentle cleaners only no abrasive scrubs)
- Hardware quality (soft-close hinges reduce impact stress on painted edges)
Homeowners who learn how to paint kitchen cabinets with durability in mind invest in quality products upfront. A $15 upgrade in paint quality is the difference between a 5-year finish and a 12-year one. Alkyd hybrids cost $5–$15 more per quart than bargain latex a difference that pays for itself many times over in longevity. Now that you know exactly how to paint kitchen cabinets from start to finish, the only step left is to pick up a brush and begin.
Frequently Asked Questions
Do I need to sand cabinets before painting them?
Yes. Light sanding is important because it removes the existing gloss and gives the primer a surface it can grip. Start with 120-grit sandpaper for light scuffing, followed by 220-grit for a smoother finish. You generally don’t need to sand all the way down to bare wood.
What is the best paint for kitchen cabinets right now?
Two commonly recommended options are Benjamin Moore Advance and Sherwin-Williams Emerald Urethane. Both are designed to provide a durable finish suitable for the daily wear that kitchen cabinets experience and can produce a smooth result when applied correctly.
How many coats of paint do kitchen cabinets need?
Most kitchen cabinet projects require one coat of bonding primer and two coats of finish paint. A third finish coat may be needed when making a major color change or when additional coverage is required.
How much does it cost to paint kitchen cabinets professionally?
Professional cabinet painting costs vary based on kitchen size, cabinet condition, location, and the complexity of the project. The figures you provided put many projects around $425 to $1,466, while larger or more complex kitchens can cost considerably more.
Is painting kitchen cabinets worth it before selling a home?
Painting kitchen cabinets can be a relatively affordable way to refresh the appearance of a kitchen before selling. The potential return depends on the home’s market, existing cabinet condition, paint quality, and overall renovation strategy, so it is best to consider the cost alongside other improvements.